VTech Storio 3S
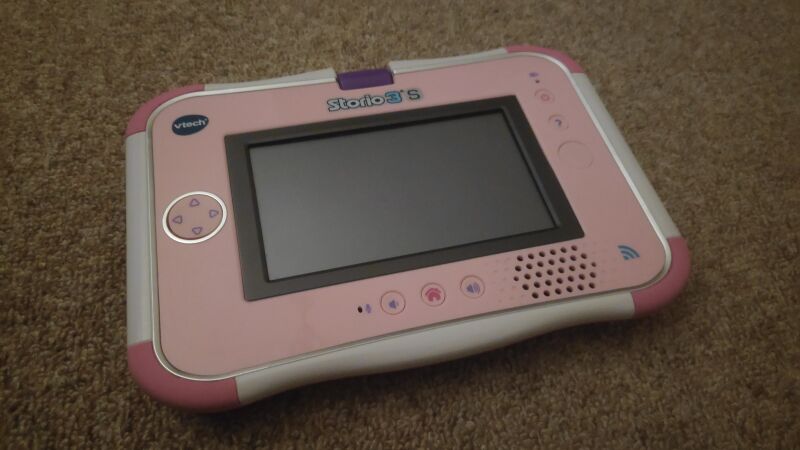
The VTech Storio 3S (or Innotab 3S outside of Europe) is a tablet for children from 3 to 9 years old. It includes coloring games, an e-book reader and other “age appropriate content”. Additional games are sold separately, either as downloadable apps or as physical cartridges.
I became interested in this device because I was looking for something to practice reverse engineering on. I bought this one second hand for 20€, and managed to find a serial port and a "secret code" that grants root privileges to it.
Gathering information
In this Hackaday Superconference 2016 talk, Samy Kamkar mentions a trick for gathering information about a piece of electronics without opening it: by law, any consumer device transmitting a radio signal and sold in the US have to be registered in the Federal Communications Commission public database. These entries are often a good source for internal and external pictures.
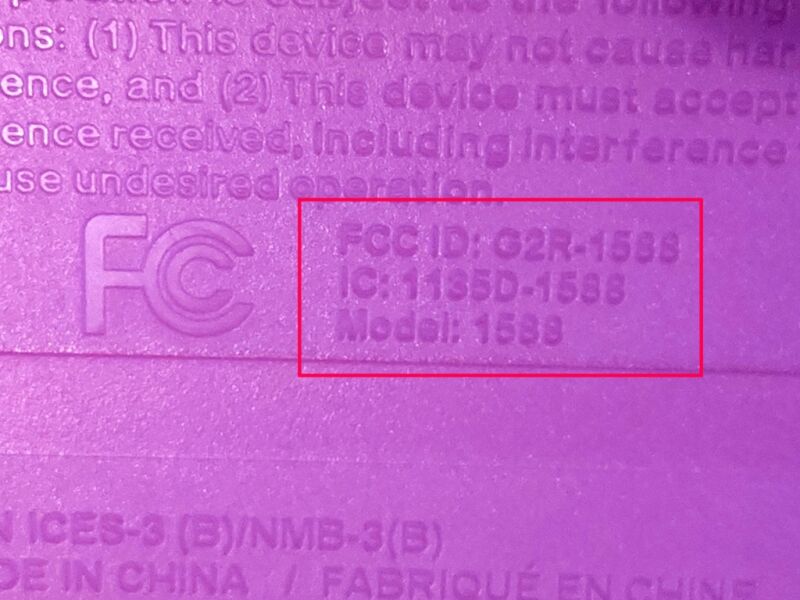
Since the Storio 3S uses Wi-Fi, we can find its FCC ID printed on the back of the device. A quick search on FCC ID.io returned several documents, including pictures of the circuit board with close-ups of the main integrated circuits.
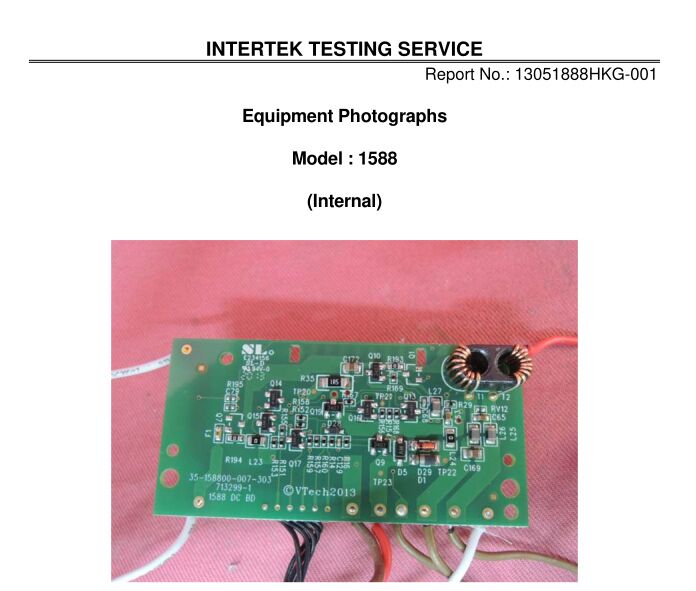
By searching online, I was able to find the function of each chip:
- Ralink RT5370N: Wi-Fi module
- PME810816BBR-E7DN: 1 Gb SDRAM
- Samsung KLM4G1YE4C-B001: 4GB eMMC flash memory
- GPL32902 A-003C-QL 172: A CPU manufactured by General Plus (I didn’t find its datasheet)
At this point I was pretty confident that this device was running some king of operating system. So the next step was finding a way to interact with it.
Finding a door
VTech probably doesn't want kids poking around the tablet's internal settings and operating system, so there was little chance for me to find some kind of terminal the "normal way". Instead, I had to find some way to connect my computer to the tablet.
During development, electronic devices like these have to be tested. So I should be able to find some connector (or traces thereof) that could be used for communicating with the tablet.
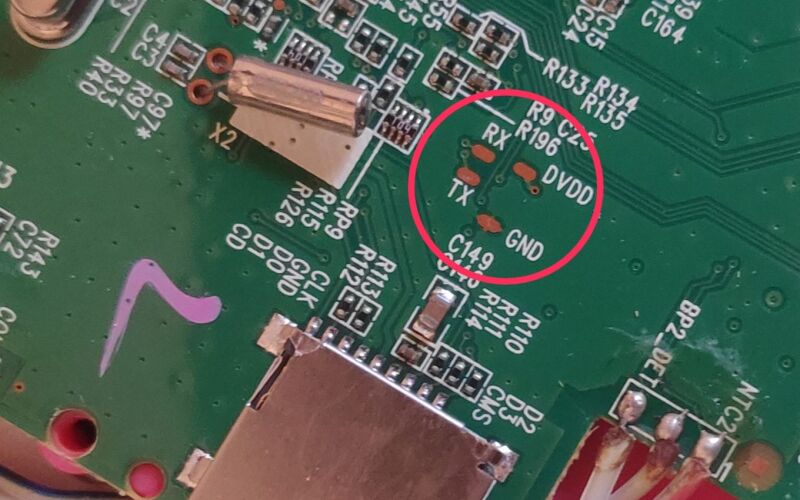
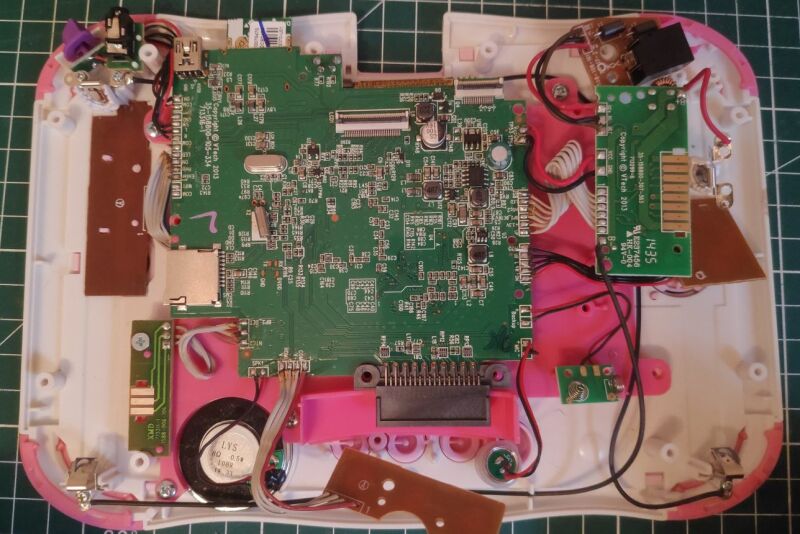
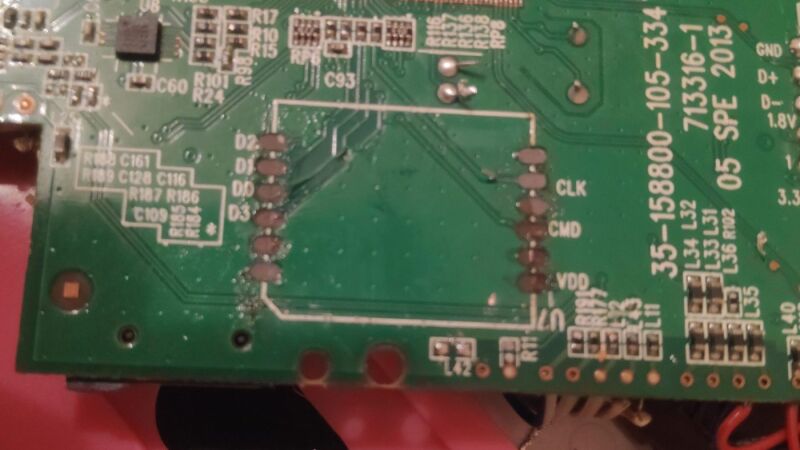
And lo and behold, there is a group of test pads near the edge of the motherboard! Here the “RX” and “TX” labels indicate “Receive”, “Transmit” connections, while “GND” and “DVDD” are used for negative and positive connections to the power supply. These are used to transmit and receive data using the Universal asynchronous receiver-transmitter (or UART) protocol. After checking that these pads were active using a multimeter, I soldered some jumper wires to connect to.
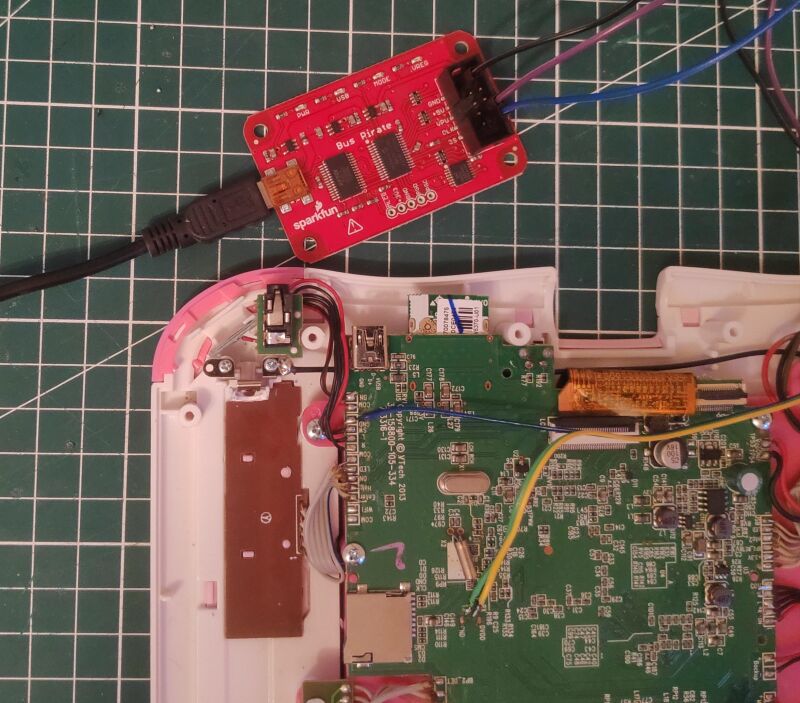
Because I couldn’t just connect these wires to my computer, I used a Bus Pirate. This “open source hacker multi-tool” connects to a USB port, allowing me to talk to the board using a terminal. After wiring the Bus Pirate to the motherboard and setting it into “transparent bridge mode”, this is what I recieved when rebooting the tablet:
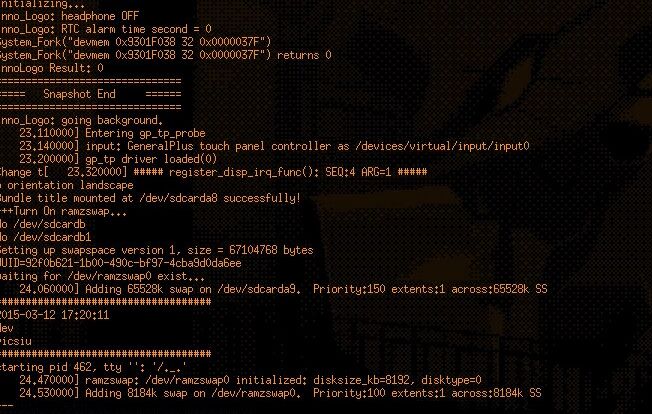
So, the tablet was sending me some debug information and, based on the file paths, it seemed to be running some kinf od Linux based OS. But I noticed something strange: while I was able to read data, the tablet wasn’t echoing what I was typing. Moreover, this terminal did not greet me with a prompt inviting me to enter a command.
In order to understand what was blocking my inputs, I perform a very precise test of “mashing the keys while the tablet was booting”, which revealed a few things:
- At the beginning of the boot process, the tablet was correctly receiving my inputs and echoing them back to me
- This echoing stopped once a particular program named “._.” started
If this program was somehow intercepting my inputs, I needed to copy it on my computer and analyze it. But how could I access the filesystem if not through the newly found serial port ?
Taking the lock apart
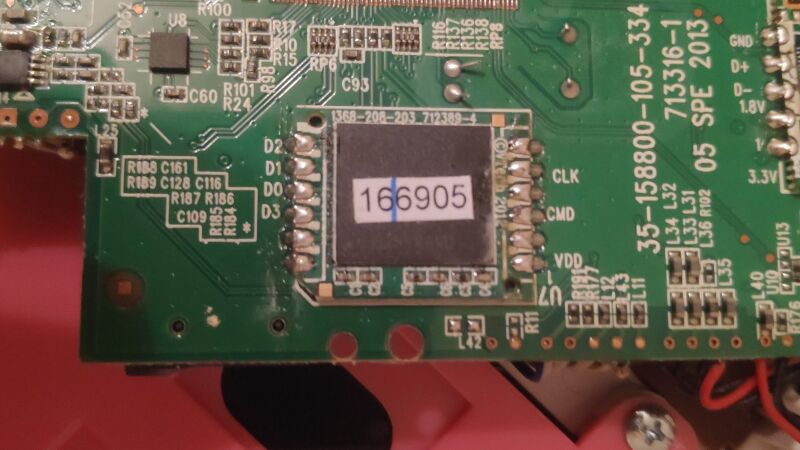
Based on the what I could gather from the chip names, this “._.” file was likely to be stored on the eMMC chip. Luckily for me, it is mounted on a separate PCB, which meant I should be able to extract it without too much hassle…
…or not. As it turned out, I wasn’t very patient and ended up ripping the PCB out, along with the copper pads it was soldered to. Which meant that I couldn’t put this chip back. But hey, at least now it was out!
Connecting it to my computer required some work. These eMMC flash storage device actually uses the same communication protocol as an SD card. So I soldered some jumper wires to a microSD to SD card adapter:
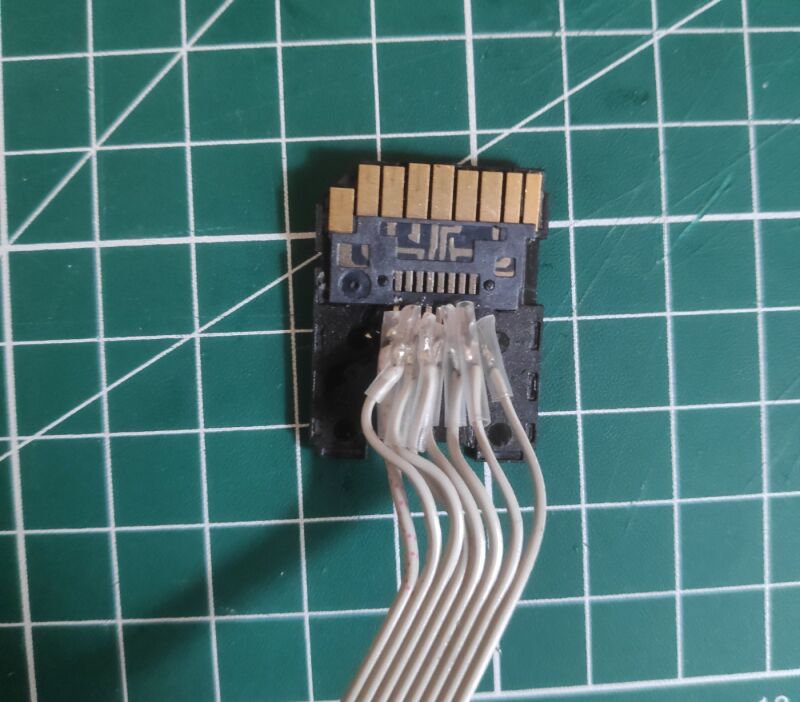
Since the pads on the PCB were labeled, I was able to match each one with the corresponding wire using an SD card pinout I found online. And once plugged into my computer, I had access to the tablet's storage:
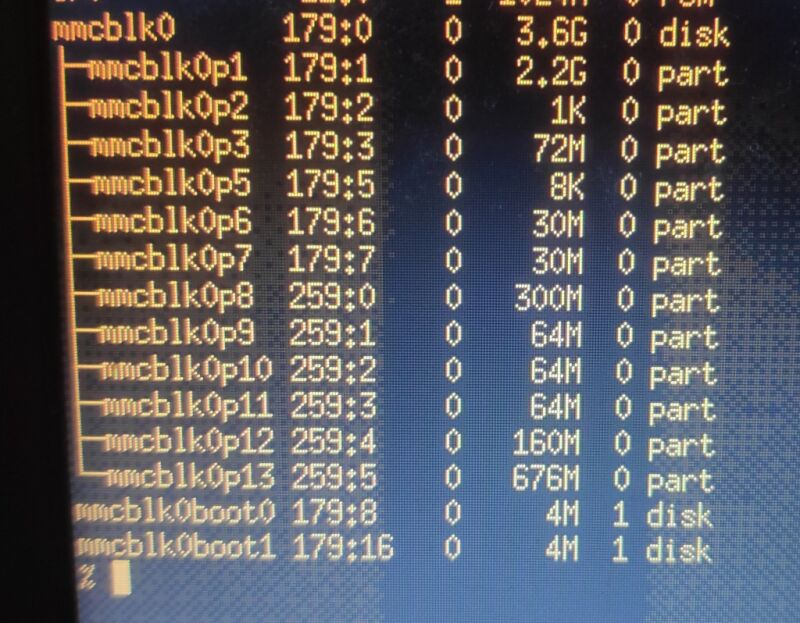
Some of these didn’t have a file system installed, so I used binwalk to extract the files they stored. The one I was looking for was on the third partition (mmcblk0p3).
To find out what this executable was doing, I loaded it into Ghidra.
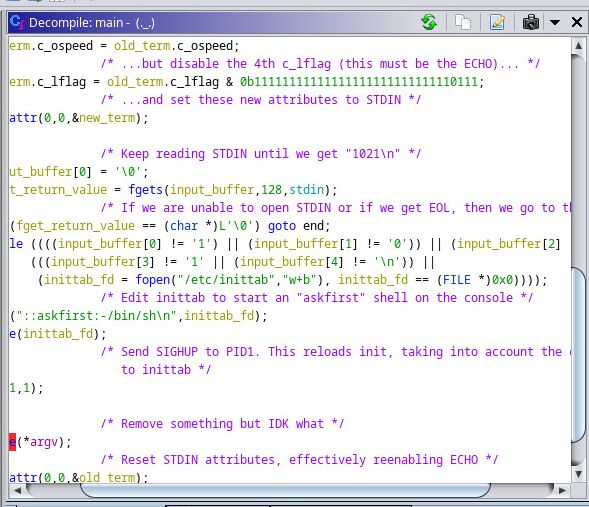
This tool takes a binary executable and translates it into more readable C code. But since things like variable or function names are discarded during the compilation process, it’s up to us to interpret whatever code it comes up with.
Eventually, I was able to piece things together and found out what this software does:
- First, it disables echo on the terminal (which is why I wasn’t able to see what I was typing once it was loaded)
- It then reads the standard input and checks for the string “1021\n”
- When this is detected, it adds a line to the inittab file telling the OS to start a terminal on the serial port
- Finally, it reloads the init process to take the modification into account before deleting itself
So apparently, all I have to do is type “1021” and press enter to get a shell ?
Getting in
I ordered a new tablet and I modified it the same way as before to add a serial port. After ._. was loaded I typed “1021”, pressed Enter and…
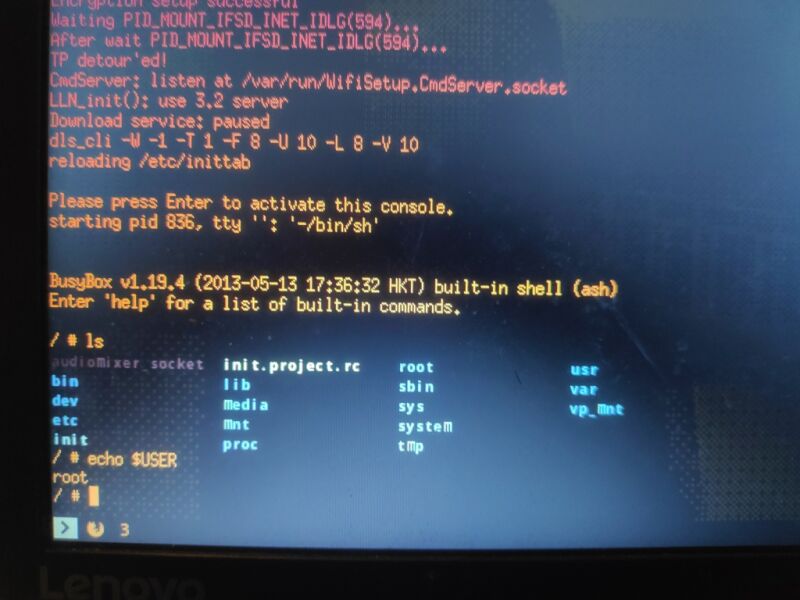
🎉
Now, to be honest, I could have found all of this information online. In fact, this has already been done before, and there are entire forums dedicated to hacking these tablets, along with patched firmware to run bootleg apps.
But I wanted to try it out myself, and I found this whole process to be an excellent learning experience: it gave context to all the things I read about, provided me with an excuse to try some new tools. Also, and most importantly, it was a lot of fun!
Furthermore, getting a root shell opens the door to a lot of new opportunities: I could try to cross-compile my own programs to run on the tablet, try to get my head around the software protection system, or just explore the filesystem to find some interesting stuff.
I hope this article inspires others who, like me, are interested in hardware hacking/reverse engineering but are too intimidated to give it a try. And if your soldering skills are better than mine, perhaps you can get away with buying only one tablet.
Resources
- Samy Kamkar’s talk at the Hackaday Superconference 2016, an inspiring talk from which I stole a few tricks used in this project
- FCC ID.io provides a more straightforward way to search for devices using their FCC ID than the official FCC website
- Hardware Hacking 101 series at River Loop Security, a series of step-by-step guides on how to approach different kind of targets
- Bus Pirate, the tool I used to interface with the serial port on the tablet. It wasn’t strictly mandatory for this project (I could have used a Raspberry Pi for UART communication), but I had one around from a previous project
- stacksmashing’s Youtube channel which introduced me to Ghidra